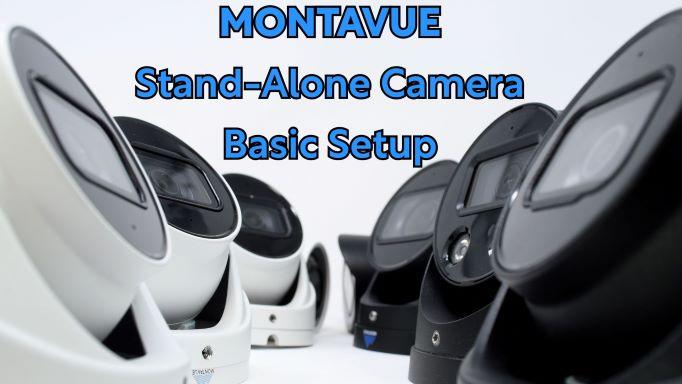

Video Transcription
hey guys welcome to monaview if you're
watching this video it's likely you just
received your new nvr system and you're
ready to install it so you're going to
follow this video and all of its
instructions in order to properly set up
your entire system including mounting
your cameras adding them to the nvr and
initializing the system and we're also
even going to go over some extra
settings at the end of this video just
to make sure your system is running at
100 efficiency after you've plugged
everything in and got everything running
so let's get started
first of all we are going to be starting
with an 8 channel nvr this is the mnr
8080 and i have a two terabyte hard
drive plugged into this one
so i'm just gonna unbox it here
[Music]
[Applause]
okay so uh first of all we have a few
components here we have our actual nvr
now the again the hard drive is
pre-installed into this unit we have our
hdmi cable which we're going to use to
plug in the nvr to the monitor behind me
now this is a 4k television uh so keep
in mind the display power is all based
on the type of television or monitor you
guys are putting this on
some calls we get and they're saying hey
the cameras don't look as good as i
thought they would well my first
question is what type of display are you
looking at it on
almost every time they tell me it's they
don't even know and it's usually a 1080p
television so if you want 4k images it
needs to be on a 4k display
so go for a 4k television or if you want
to spend a little bit extra money you
can do a 4k monitor um to me they all
look the same so
so here we've got our power cable
and a mouse
[Music]
all right
so i'm going to start by plugging in
all my components to my nvr
i've got my power cable i'm just going
to keep this short
hdmi
and our mouse
[Music]
okay
finally the power
as soon as we plug this in there's no on
or off switch so this nvr is going to
power right up
you should see these lights and so now
we need to change the inputs on my
television
[Music]
so i'm going to go home
hdmi one
voila
[Music]
now just like a computer this is going
to take a minute to boot up
all right so the first screen it's going
to take us is the initialization
uh wizard so that is what we are going
to go through first
so for this first page here we're just
doing mostly time settings and location
so here we're going to choose united
states for the majority of you
then we're going to choose the english
language and the video format we want is
ntsc next i'm going to set up my time
settings so first of all i'm going to
set up my time zone i'm in montana so
i'm going to choose mountain time
and then i'm going to make sure my date
and my time are correct
once i've established those now you can
choose to do dst this stands for
daylight savings time i'm going to opt
out of this but if you guys want
optionally you can set up your daylight
savings time parameters here and i'm
going to keep online updates active and
i'm going to hit next
so next we have our password screen go
ahead and put in your password it does
have some limitations on it which are
described to the right it has to be at
least eight characters
and it needs to contain at least
uh a number and an uppercase letter or a
letter and a symbol and a number
either way just make this password to
fit into those parameters so this is a
really important section here and this
is what i'm going to really hammer in
because this is a call we get far too
often and that is for getting passwords
now this is a security system it is
intentionally difficult to get into if
you don't have the password
so
once you guys create this password for
your nvr
write it down tattoo it to your arm do
whatever you have to do put it in
multiple locations tell a trusted family
member whatever you guys can do to
secure this password do it because it is
a nightmare to lose and personally we
don't really like dealing with it so um
it can be totally avoided just remember
your guys's password you can set a
password hint this is totally optional
if you choose to activate the unlock
pattern it's going to give you a little
dot connector similar to when you unlock
a phone
instead of the password just for easier
and faster access to your mbr my issue
with this is that i see a lot of people
become complacent with touching the
pattern and eventually they forget their
password it'll have you do the pattern
twice so just yeah so next we have our
email and security questions these are
used to recover your guys's password if
you do ever forget it um so here you
guys can fill out security questions but
it'd be my recommendation to actually
deactivate them
just by clicking this little button here
and then reserve email you guys can just
put in an email that you have access to
all right here's a fair warning to you
guys whatever email you put in this box
is what email you will need to have
access to in order to recover your
password if you ever forget it
so another thing we see here is
oftentimes with businesses
they will have some of their lowest
employees set up this system
or they'll have the installer set up the
system
and those guys will use their email in
this section later on down the road once
the password is forgotten we go to
recover it for that email and of course
we don't have access to it because that
employee quit six months ago or that
installer we can't get a hold of them so
here's where it's really important that
you guys put an email that you
personally have access to and will
always have access to in the future all
right we're gonna do now is plug this
nvr into my router what this is going to
do is it's going to give me internet
access and keep in mind the nvr does not
have built-in wi-fi
because it's dealing with so much data
transfer
wi-fi just isn't a proper medium to do
that because it's a little bit too slow
so it has to be hardwired so what i'm
going to do is i'm going to plug a 100
foot ethernet cable
going from
my lan port which is your network port
on the back here
it is separated from the other camera
ports and it has two little lights on
the other side
so it's pretty easy to identify
so you can plug that in
and i'm going to run the other end to my
router
but with this next page is asking is
it's asking for the parameters of your
guys's internet
now here is where you would want to
click this little button called dhcp
and what that does is it tells your nvr
to automatically configure itself based
on the network that it's currently
plugged into so if you guys are already
plugged into a router and you press this
button it will get all of those numbers
that it needs from your router and will
automatically go online if everything is
well
if you guys are wizards with internet
and you know your ip addresses in and
out you can go ahead and put in a custom
ip address in here as long as it fits
within the parameters of your network it
should work
but dhcp for most of you because this
stuff can get pretty complicated
all right this next page we simply just
want to make sure that this is enabled
and here it's going to give us our
status of either offline or online it
will be grayed out no matter what it
says just because we don't want to give
the impression that you can change this
here
so if this does say online then you guys
have an active internet connection uh if
it says offline then we may need to take
a look at your guys internet protocols
or some of the numbers to get that
online
if you're not connected to a router this
will say offline by default
so keep in mind this will only change if
you guys are plugged into an active
internet connection this barcode on the
left the mobile client is no longer
active so just ignore that qr code
altogether but this one with your serial
number can be useful in some cases so it
may be prudent to take a picture of it
and save on your phone
just for later use because we use this
qr code to add to cell phones devices
like that
and it can be pretty useful down the
road
all right next page this is our
registration page now because this is a
basic setup we are not bringing any
cameras in from the network we are
plugging our cameras directly into the
nvr
now by doing this is a plug and play
system so we should be able to avoid
this page altogether we do not want to
register our cameras we simply just want
to plug them in when we're ready and
they will come up on their own
so we're going to skip this page
this page shows all the information
about your guys's hard drives that are
installed so as you can see i've got a
two terabyte hard drive it comes in at
1.8 technically because you need some of
that space for programming
but as you can see here it is active it
has free space available
and it's healthy so
we are going to continue
okay the final message you guys see is
thank you for purchasing our product
once you guys see this the nvr is now
initialized and we're ready to start
plugging in cameras and setting up the
system all right so i want to show you
guys the cameras here
so the plan today is i have two cameras
i have an mtt 8105 which is a 4k camera
with 15 frames per second i'm going to
be setting that up in our lobby
downstairs
the second camera is going to be an mtb
8105 this is a bullet camera and i'm
going to be setting this up using a
junction box outside the office so you
guys get a little demonstration of what
it looks like to weatherproof a camera
and what it looks like just to plug in a
camera inside you get a little bit more
freedom there so let's get into that so
first off i want to test them here
before i go and take the trouble of
mounting them this is to make sure that
there's no defect with the cameras this
is extremely rare so there's likely not
going to be
and it's more importantly going to make
sure there's no defect with the cables
nine times out of ten if there's any
issues with these cameras it's usually
the cable so
we're gonna do that just to make sure
everything pops up
[Music]
okay so i'm gonna plug it into port one
and then maybe some extra cables on the
back of your guys cameras like the
active deterrence uh but keep in mind
the only thing you guys really need is
the poe plug-in
all right so that's in there
keep watching the square it's gonna pop
up
[Music]
you know this for that click
and now we wait
[Music]
there's our first one
see a good little shot of the set here
not much to it i guess
[Music]
oh here comes our second one
there it is looking at the ceiling so
all right very nice so we have two
active cameras and two cables that are
working so we're ready to install these
so let's go and take care of that
[Music]
[Music]
so
[Music]
so
[Music]
all right guys as you can see we now
have our cameras plugged in they are
mounted and they are popped up looking
beautiful so um now we're just going to
go over some quick settings here just to
get you guys started there are some more
advanced settings that you guys can
check out our other videos for
but these ones are going to be ones that
you want to change right away to get the
most efficient use of your cameras
so first of all we're going to go to the
encode settings and we're going to
change some recording options
all right first we want to right click
anywhere on the screen and then we're
going to choose main menu this is how we
access the main menu every time so if
you ever hear a reference to main menu
this is what we're talking about right
click left click main menu and then it
should have you sign in whether it's
with the password that you guys wrote
down or it's with that little shortcut
key either way we're gonna put this in
and then we're gonna be granted access
to the main menu
once we're in the main menu we're gonna
select camera this option down here on
the lower left then we're going to look
for the category called encode on the
left side go ahead and left click that
keep in mind every right click you guys
do within the menu system is your back
button so just be careful when you're
pressing that if you ever land in a spot
where you're not sure how to get out of
just right click a whole bunch to get
out of there otherwise you're gonna have
to left click everything for these
instructions so once we're in the encode
menu the first thing you guys want to
change is your compression rate for both
of your streams
basically you have your main stream on
your left side this is what gets
recorded to your hard drive this is the
full 4k stream or the highest resolution
stream
then you have your sub stream this is
what gets sent over the internet to
devices like your phone or your laptop
and the idea of the substream is that
it's a slightly broken down version but
this enables it to travel much faster in
smaller packets through the internet so
that it loads on your small phone that
has much less processing power than your
nvr
in a rapid amount of time you guys can
choose to do the main stream on all your
remote devices but it's important that
we have our substream activated so that
if you guys are in a location or just a
circumstance where you don't have that
creative internet service you can still
get live displays for your cameras
without interruption so the first thing
we're going to do check that compression
rate it's likely going to be at h.264h
here we want to change that to
h.265. again this is for both substream
and mainstream we want to make sure
substream is checked with this video we
want to make that blue
smart codec on the mainstream
i keep this gray it takes a little bit
of extra recording time for your storage
and it doesn't really produce great
results so smart codec i'm going to
recommend keeping that gray and off
and again substream should be active for
video and blue uh and finally you can
leave the rest of this this is most of
your guys's choosing whether you want
your resolution or your frame rate
that's all up to you guys
but the one thing you're going to want
to make sure is your bit rate this is
the very bottom option of your
mainstream and your substrate
your mainstream bitrate with a 4k camera
should never go beyond
six 4096
thousand and ninety six so if it's
anything beyond that like eight thousand
or six thousand go ahead and click on
that and we're gonna set it back to four
zero nine six
and we wanna make sure we're hitting
apply before we move on any other
cameras too with these settings
and it doesn't do anything dramatic once
you hit apply but as long as you left
click it you just have to trust that
it's saving those settings that you've
just changed
the substring bit rate that can be set
at a thousand or 500 that one matters
less because it has less data to move so
that one's not going to matter but
you're getting your mainstream 4096 for
that bitrate and finally we want to
check our audio settings so any camera
that has a built-in microphone is going
to have this extra option at the very
bottom of each category called more or
more setting on some firmware so if we
click that it's going to give us options
for our audio and we simply just want to
make sure that the audio and code is
turned on if you guys want to record
audio
so just flip that little switch from
grey to blue press ok and then do the
same thing for your substring we want to
activate that as well it's likely by
default your main stream will be active
but your sub stream will be deactivated
so here it's important to go in and
change that
once you've changed all these settings
again make sure we hit apply
and then we can go on to our next camera
which is up here
so it says channel one we want to click
that and we're gonna bring it to channel
two
and then we're going to make those exact
same adjustments for all of your cameras
once you're set up to that you will be
recording at your best efficiency you're
getting the most out of your storage and
your cameras will still look 100
all right before we leave the camera
section we are going to look to the left
and this time i'd like you guys to click
on camera name
and real quick i'm going to show you
guys that you can name your cameras
and all you got to do is just click on
these little boxes the on-screen
keyboard will come up and you just
simply type in what you want your camera
to be called
this will show up in the lower left
corner of the camera image and so this
can be really useful for naming your
cameras depending on where they are
totally optional if you guys don't want
to do it it'll just say camera one or
ipc
but if you guys do change the camera
names make sure you hit apply in the
bottom right corner before leaving this
page all right next we're going to right
click and we're going to go back to the
main menu this time we're going to go
into storage here at the bottom and
we're looking for an option called
schedule it should be on the left side
towards the top and what schedule does
is it can tell your cameras to record 24
7 which is their default mode so this is
indicated by the green lines you see for
each day of the week that means those
cameras are recording
all day every day
however you can customize each
individual channel
and so you can make these cameras either
record 24 7 record on motion only a
hybrid of the two really it's whatever
you guys want
in order to adjust these all you have to
do is click on the color box up top
so for motion we're going to want to
click on this yellow box
and for trip wires we're going to want
to click on ivs or this blue box
so simply just click on those and then
once you have a check mark in the
colored box then that means that is the
current color you are now editing
so as you see once i put a check mark in
there and then i click on the schedule i
can fill in that schedule with my
desired type of recording
you can even link the days so rather
than doing one by one you can just do a
mass edit
and so here i'm setting up this camera
to be 24 7 recording
and i'm going to set it up for motion as
well this way when i go into the
playback i'm going to see mostly green
which indicates 24 7 recording but
anytime my camera captures motion it's
going to have a little bit of yellow
indicated there so this is really useful
for identifying when events happen and
you can kind of sift through all that
boring footage where there may not be
anything happening
same thing with the trip wires if you
have blue on there anytime your tripwire
is activated you'll see a little blue
slash in your playback timeline you can
do motion only recording this comes with
a few pros and cons
but if you guys are looking to save a
massive amount of storage then you can
set your cameras to record on motion
only
all right once you guys have your
schedule completed the way you guys want
it to look make sure you hit apply
and if you go on to another channel for
the schedule make sure you hit apply as
well before going on to say channel 2 in
this instance
once you've got your cameras looking
good let's back out of here
and the final location i'm going to show
you guys to check out here is the
display options
some of you it may be on the second page
of the main menu some of you might be on
the first if it's on the second page in
order to access that just above storage
you're going to see this little white
arrow if you click on it it takes you to
the second page of the main menu
and here we're going to find possibly
our display option and our audio option
so
once we click on display most of this
stuff is going to be the default
settings of what you would want there
are a few options here that you guys can
play around with however there is one
important option on here that can
sometimes cause a lot of havoc within
some systems and that is the output
display
now a call we get far too often on the
tech support line is people that have
chosen the output resolution beyond what
their monitor or television is capable
of
so for instance a lot of our customers
think that they are on a 4k television
and so they choose the output resolution
to be 4k
however when they do that because that
television or monitor is not capable of
producing a 4k image it simply just goes
black and it stays that way
so for those of you that don't know what
kind of tv you guys have play it safe
choose 1080p
or just go get yourselves a 4k monitor
so that you can experience what you paid
for you paid for a 4k camera you should
get a 4k display to represent that
for those of you sticking with 1080p
just make sure you don't go beyond this
if you guys do
your screen's gonna go black and you can
either plug your nvr temporarily into a
4k television just to set it back
or you can try logging into your nvr
through a computer using the ip address
and that way you can access the display
settings and change it back to 1080p
it is kind of a nightmare to deal with
so
this is why i'm mentioning this
specifically in this video do not choose
4k if you do not have a 4k television
all right i've said it there you go so
um that's pretty much all i've got for
you guys that is the full basic setup
you guys should now be looking at an
operational nvr cameras and you should
be good to go if you have any questions
that stretch beyond this feel free to
check out the rest of our youtube
channel we have lots of how to's and it
gets pretty in-depth with some pretty
intense settings
if you guys have any questions that go
beyond those videos or if you're just
stumped with the current setup or if you
hit any roadblocks give our tech support
a call we are here monday through friday
to answer any questions you guys have
for us
as always thank you for checking out
monaview again check out the rest of
those videos like and subscribe to the
channel that way when we come out with
more how to's in the future you guys
will get notified of those right away
thanks for choosing monavie you guys and
have a fantastic day